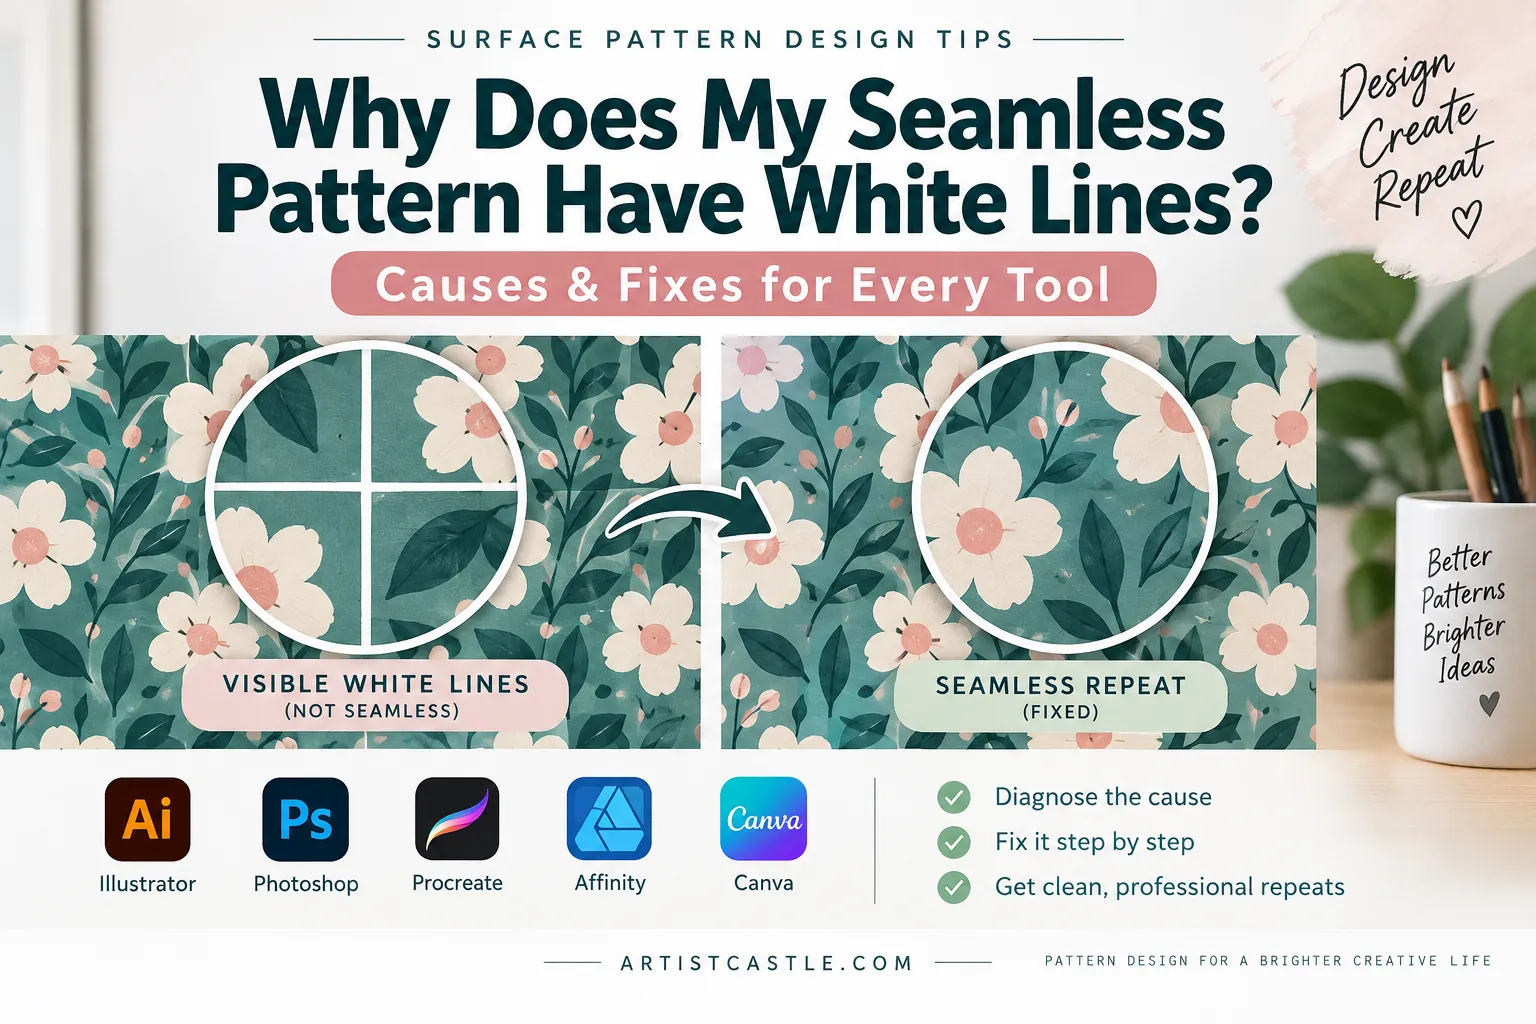
You zoom in on your finished pattern, tile it out, or upload it somewhere — and there it is. A thin white line. A faint gap. A hairline seam running along one edge, sometimes both. It’s one of the most common frustrations in surface pattern design, and it shows up in almost every tool: Illustrator, Photoshop, Procreate, Affinity, Canva, and after uploading to print-on-demand or fabric printing sites.
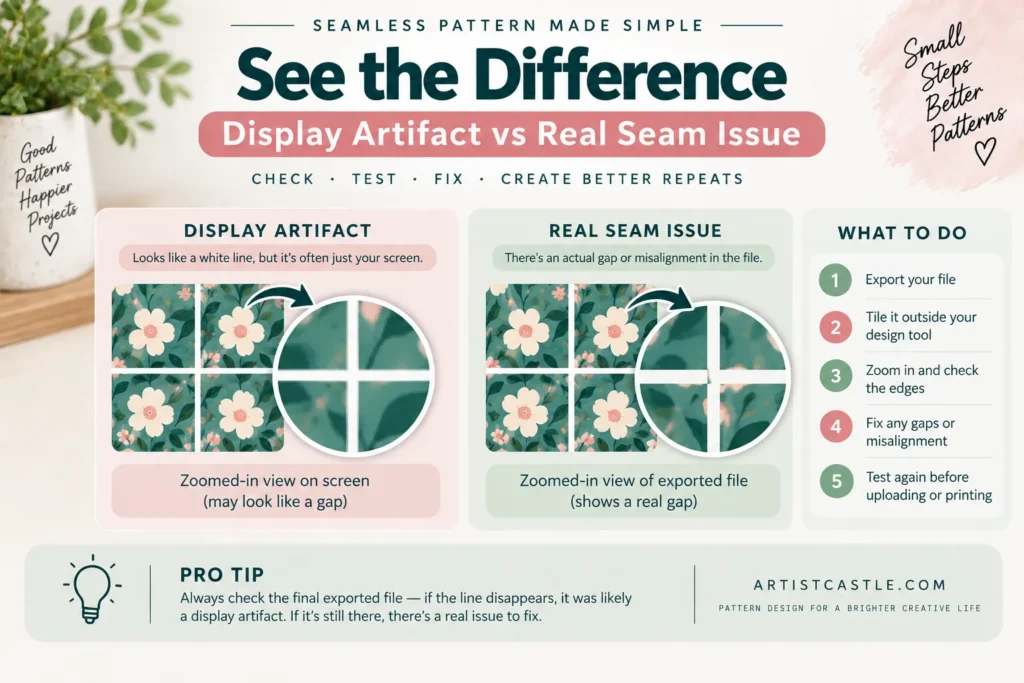
The confusing part is that the same-looking line can have completely different causes — and completely different fixes. Sometimes it’s nothing: a screen rendering quirk that will never show up in your finished file. Sometimes it’s a real flaw in your pattern tile that will print exactly as you see it. Guessing which one you’re dealing with, and applying the wrong fix, is how people end up going in circles.
This guide starts with that diagnosis, then walks through the causes and fixes by tool.
Quick Answer
A white line, hairline seam, or gap in a seamless pattern usually comes from one of three things: a screen-only rendering artifact that doesn’t affect the actual file, a genuine gap or misalignment along the tile’s edges (what Spoonflower’s own documentation calls a “pixel line” flaw), or an artifact introduced during resizing, transforming, or exporting the file. Before applying any fix, the first step is working out which of the three you’re actually looking at — because the fix for a display bug is different from the fix for a real edge gap.
1. First: Is the White Line Real, or Just a Display Artifact?
This is the step most troubleshooting guides skip, and it’s the one that matters most.
Display-only lines are reported in Illustrator pattern-swatch workflows — a thin line that appears in the app’s canvas at certain zoom levels but shifts or disappears at others, without necessarily existing in the underlying file. This is a widely reported community experience rather than an official, documented Adobe finding, and reports are mixed: some users find the line really is only cosmetic, while others report that a similar-looking line still shows up after export. Don’t assume either way — verify by exporting the file and independently tiling it, as described in Section 3.
A real flaw is different: it exists in the pixels themselves, and it will show up wherever the file is used — in an export, in a print, or on another platform.
Here’s a simple way to tell them apart:
| What you see | What to test | Likely category | Next step |
|---|---|---|---|
| Line appears/disappears as you zoom in and out inside your design app, but never in an export | Export the file (PNG/JPEG) and tile the exported image separately — not just the on-screen swatch | Display artifact | Ignore it in-app; confirm it’s gone from the actual exported file (see Section 3) |
| Line is visible in the exported file when tiled, at a consistent position | Zoom to 100% on the exported file and inspect all four tile edges | Real edge/repeat flaw | Go to Section 2 — check tile alignment and edges |
| Line appeared only after resizing, rotating, or transforming the tile | Compare pixel dimensions before and after the transform; check the interpolation/resampling method used | Resampling artifact | Go to Section 4 — anti-aliasing and transforms |
| Line/gap appeared only after uploading to a POD or fabric-printing site, not in your own files | Zoom into your original file first, before assuming the platform is at fault | Could be either — needs the same file-level check | Go to Section 10 |
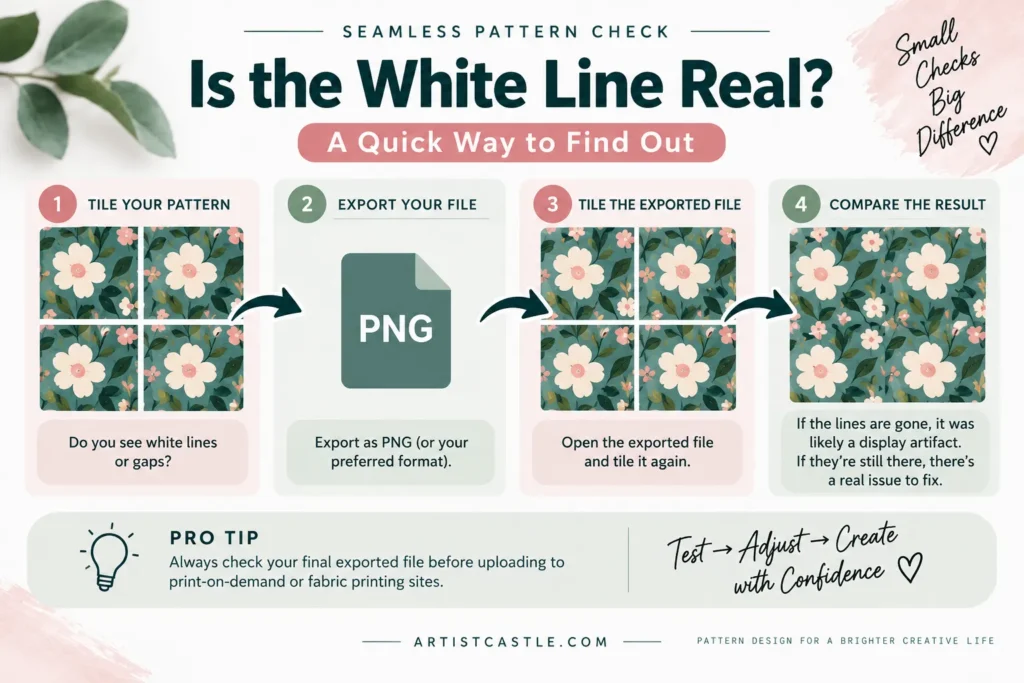
If you’re not sure, the export test in Section 3 is the most reliable way to check: if the line disappears when you export and independently tile the resulting file, that strongly suggests the original line was a display artifact.
2. Check Whether the Pattern Tile Actually Repeats Correctly
Spoonflower’s own documentation is a useful reference here, since it’s one of the few places that defines this clearly: Spoonflower describes “repeat flaws” as gaps along the edges of a design tile, which it says can print as lightened or unprinted areas, solid colored lines, or as squares around the whole design — commonly called “pixel lines.” These happen when the artwork at one edge of the tile doesn’t line up exactly with the opposite edge.

To check for this yourself, regardless of which platform you eventually use:
- Zoom to 100% on your actual file — not a shrunk-down thumbnail. Flaws that are invisible at a small preview size often become obvious at full resolution.
- Tile the file at least 2×2 or 3×3 so you can see multiple seams at once, not just one edge.
- Check all four edges, not just the two you were focused on while designing. It’s common to check left-right alignment carefully and forget top-bottom, or vice versa.
- Look for two different problems: a straight-line gap (edges don’t quite touch) and a misalignment (the artwork is offset, so a motif doesn’t connect to its own continuation on the opposite edge). Spoonflower’s documentation shows both as distinct examples of the same underlying issue.
If you find a genuine gap or misalignment at this stage, the fix happens in your original file — nudging elements back into alignment, extending artwork fully to the tile edge, or rebuilding the tile boundary — before you export or upload anywhere.
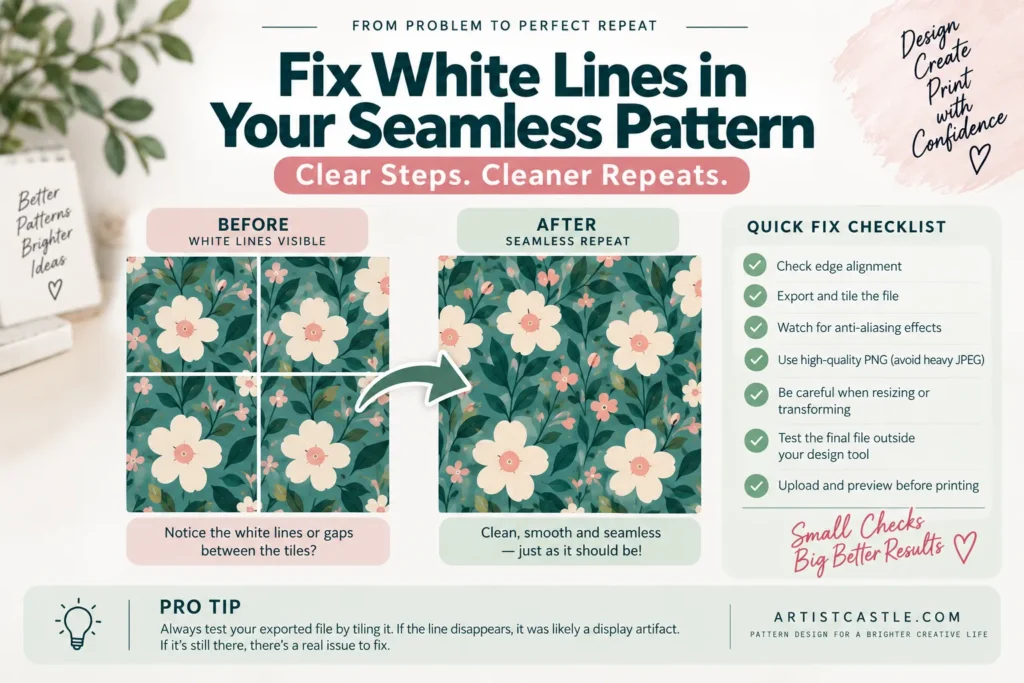
3. Check the Exported File — Not Just Your Working Canvas
This is the step that resolves the most confusion. What you see in your design software’s canvas or pattern-preview panel is not always what’s actually inside the exported file. The two can genuinely differ.
To check properly:
- Export the pattern the way you actually intend to use it (PNG, JPEG, TIFF — whatever your target platform expects).
- Open that exported file on its own, separately from your working document.
- Tile it — either by placing copies edge-to-edge, or using your software’s own “fill with pattern” feature on a large test canvas.
- Zoom in on the seams in that tiled test, not in your original artboard.
If the line is present in your working canvas but disappears once you do this test on the exported file, you were looking at a display artifact (Section 1). If it’s still there, it’s a real flaw in the file, and the cause is either the tile’s edges (Section 2) or something introduced during export or a prior transform (Section 4).
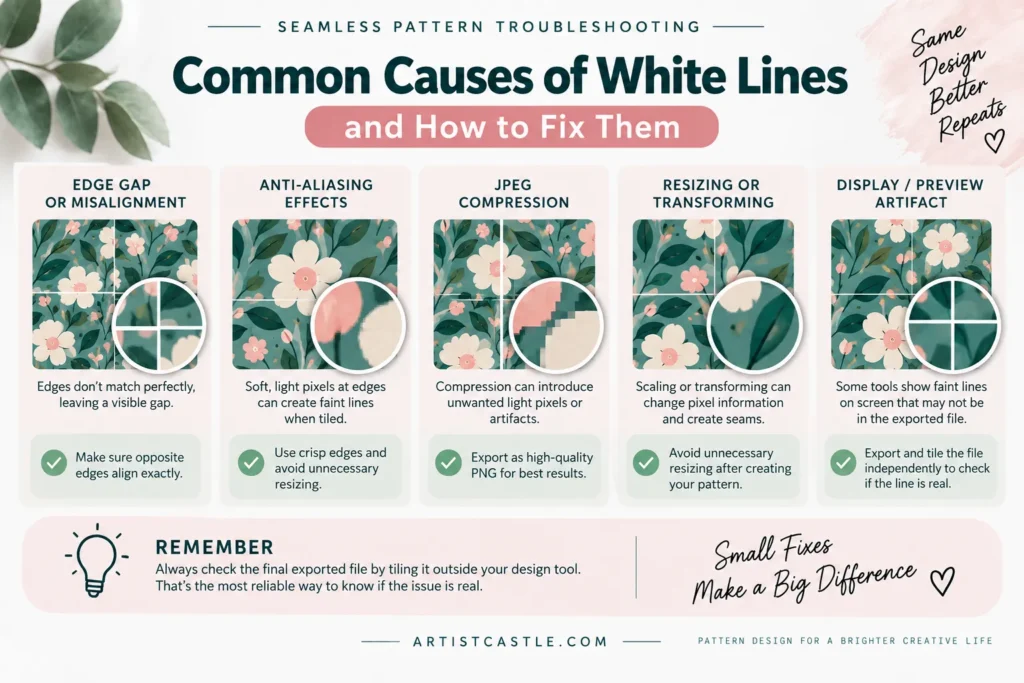
4. Anti-Aliasing, Resizing, and Transformations
Several export and resizing settings can genuinely affect pattern edges. This section only covers what’s confirmed in official documentation — some forum threads propose more specific mechanical explanations than the software makers themselves confirm, so those are left out here rather than presented as settled fact.
Anti-aliasing
Adobe’s own documentation describes anti-aliasing as smoothing jagged edges by averaging the colors of boundary pixels, and lists two relevant export options: Art Optimized, which applies anti-aliasing to all objects and text, and Type Optimized, which applies anti-aliasing suited specifically to type. Anti-aliasing softens edges — including the outer edges of your pattern tile — which is why the choice of setting can visibly change how a tile boundary looks once exported. If you’re troubleshooting a seam, it’s worth exporting the same file with each anti-aliasing setting and comparing the result at the tile edge specifically.
JPEG compression
Adobe’s documentation on JPEG export also confirms that saving in JPEG format introduces compression artifacts — described as wavelike patterns or blocky areas — every time the file is saved, and recommends always exporting JPEGs from the original file rather than from a previously saved JPEG. For a seamless pattern, this matters most at the edges: compression artifacts are more visible along sharp boundaries and areas of high contrast, which is exactly where a tile seam sits. If a line looks slightly different in a JPEG export than in a PNG export of the same file, this is a reasonable first thing to check.
Resizing and transforming
Once you’ve resized, rotated, or otherwise transformed a raster tile, the software has to recalculate — interpolate — the pixels to fill in the new dimensions. This process can shift how cleanly the tile’s edges still line up, especially if the transform wasn’t applied by exact, whole-pixel amounts. Procreate’s own Handbook documents three interpolation methods available for transforms — Nearest Neighbor, Bilinear, and Bicubic — and explains the tradeoffs: Nearest Neighbor only considers the pixel on each side of an edge, which is fast but can look jagged; Bilinear considers a 2×2 area of surrounding pixels for a smoother but softer result. (Procreate’s own documentation is not fully consistent about which interpolation mode is the default across versions, so this guide won’t state one — check your own Transform settings directly rather than assuming.) The practical takeaway across tools: after any resize or rotate, re-check your tile’s edges specifically, rather than assuming a transform that looked fine in the center of the canvas didn’t affect the boundary.
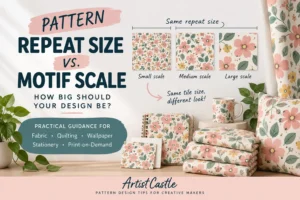
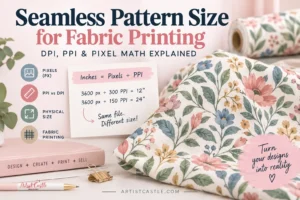
If your pattern repeats correctly but prints larger or smaller than expected, see our seamless pattern size for fabric printing guide for the pixel, DPI and PPI calculations.
5. Illustrator Troubleshooting
- Check for fractional pixel values. Double-click your pattern swatch to open Pattern Options, and check the Width/Height fields. Fractional (non-whole-number) values are frequently mentioned alongside visible seams in Illustrator user reports, though Adobe’s own documentation doesn’t establish this as a confirmed, universal cause. It’s worth checking and correcting to whole numbers as part of troubleshooting, then re-testing with the export check in Section 3.
- Try Art Optimized anti-aliasing on export. This is one of the most frequently cited fixes for lines that appear specifically on export rather than inside Illustrator itself — worth testing against Type Optimized and no anti-aliasing to compare.
- Confirm your Artboard matches your artwork exactly. A mismatch between the Artboard and the actual artwork bounds is a documented cause of pixel-line issues, since it changes what gets included when the file is placed or exported elsewhere.
- Remember: what you see in the Swatches panel preview is not guaranteed to match your export. Always run the export test in Section 3 before concluding a line is fixed or unfixed.

6. Photoshop Troubleshooting
- Use Edit > Define Pattern, then Fill, on a large test canvas to see multiple repeats at once — this is the same method Spoonflower’s own help documentation recommends for spotting pixel-line flaws before uploading.
Beyond that check, treat any more specific technical explanation you find for a Photoshop seam as something to test on your own file rather than a confirmed cause — we couldn’t verify a specific mechanism against Adobe’s own documentation. The export test in Section 3 applies here too.
7. Procreate Troubleshooting
- Use even-number canvas dimensions so the canvas can be split cleanly in half when building a repeat — odd dimensions make it harder to position mirrored or corner-duplicated elements on exact pixel boundaries.
- Make sure Snapping/Magnetics are enabled when moving layers into position for a repeat, so pieces lock to precise positions instead of landing a pixel or two off.
- Check your Interpolation setting before any transform (Modify > Transform > Settings), and be aware the three available modes — Nearest Neighbor, Bilinear, Bicubic — trade off sharpness against smoothness differently at edges. Test results rather than assuming one setting behaves identically to how it behaves in a different app.
- Avoid tapping the canvas to nudge a selection more than necessary once it’s placed — Procreate’s own documentation notes that a single tap-to-nudge moves a selection by one pixel, which is exactly the kind of small offset that produces a hairline gap.
8. Affinity Troubleshooting
There isn’t official Serif/Affinity documentation specifically addressing white lines in pattern fills at the time of writing, so the fixes here are the ones consistently reported by Affinity users going through this issue, rather than an official root-cause explanation:
- Build your repeat using whole-pixel dimensions from the start (an even-numbered square document, for example), since this is the most consistently reported way to avoid edge gaps when placing or duplicating tiles.
- Test with the Pattern/Symbol tools’ live preview before exporting, and separately re-check the exported file per Section 3 — the live preview and the exported file are not guaranteed to be identical.
- If a thin gap only shows once two separate placed copies are butted together (rather than using a genuine repeat/pattern fill), check that both copies are placed at exact, whole-pixel coordinates — manual placement is a common source of the “thin line between tiles” issue reported in Affinity’s own user forums.

9. Canva Troubleshooting
Canva doesn’t have a dedicated seamless-pattern or repeat-fill tool the way Illustrator or Affinity do — patterns are typically built by manually duplicating a tile and snapping copies edge-to-edge. That workflow has its own, simpler failure point:
- Check whether the duplicated tiles are placed at an exact edge-to-edge position. Precise placement is worth checking first, since Canva patterns are built manually rather than with a dedicated repeat tool — but treat this as a checkpoint, not a confirmed diagnosis, since we don’t have evidence establishing what causes gaps most often in Canva specifically.
- Use Canva’s Position panel to nudge the duplicate precisely rather than dragging by eye, which is much harder to get pixel-perfect.
- Test your background/tile the same way before relying on it: duplicate it once, snap the copies together, and check whether the design lines up cleanly left-to-right and top-to-bottom before building anything on top of it.
- A gap that shows in Canva’s canvas may or may not show once downloaded — always check the actual downloaded file, not just the editor view, following the same principle as Section 3.

10. Why White Lines Can Appear After Uploading to Spoonflower or Other POD Platforms
It’s tempting to assume a platform is “adding” a line that wasn’t in your original file. Spoonflower’s own Help Center is explicit on this point: Spoonflower states that it will never modify or edit your design and prints all orders using your uploaded file. In other words, if a pixel line or gap shows up in Spoonflower’s preview or on a printed sample, the most likely explanation is that the flaw already existed in the uploaded file — not that the platform introduced it during processing.
That’s exactly why Spoonflower’s own guidance is to check for repeat flaws before uploading, using the zoom-and-tile method covered in Section 2, rather than relying on the platform’s preview to catch it for you.
The same general principle is worth applying to other print-on-demand platforms: check the file itself first, using the export test in Section 3, before assuming the destination platform has changed something you can’t control. If you’re new to selling on print-on-demand platforms generally, our beginner’s guide to starting a print-on-demand business covers how different platforms handle uploaded files at a broader level.
It’s also worth separating this from a related but different problem: a pattern that repeats without gaps but prints at the wrong physical size. That’s a resolution and pixel-math issue rather than a seam issue — our guide to seamless pattern size, DPI, PPI, and pixel math for fabric printing covers that specifically, including why the same file can come out a completely different size on different platforms.
If you’re still setting up where and how to sell your designs, our print-on-demand business guide covers the broader process from choosing a niche to preparing products and launching your store.
11. A Simple Seamless Pattern Diagnostic Checklist
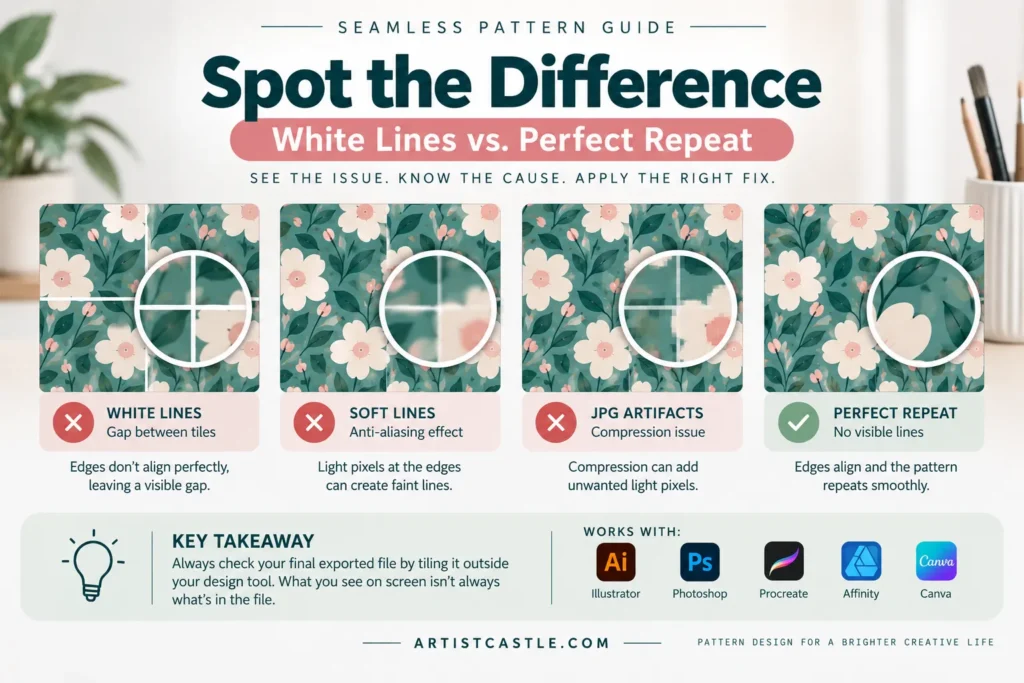
- Zoomed to 100% on the actual exported file, not just the working canvas or a thumbnail preview
- Tiled the exported file at least 2×2 to check all four edges, not just the two I was focused on
- Confirmed whether the line survives outside my design software (export test), to rule out a display-only artifact
- Checked pattern tile dimensions for fractional/non-whole pixel values
- Compared results across available anti-aliasing or export settings, if the line appears specifically on export
- Re-checked tile edges after any resize, rotate, or transform — not just the center of the design
- If uploading to a POD or fabric-printing platform: checked the original file for flaws first, rather than assuming the platform introduced the issue
- Kept a backup of the original file before making corrective edits, in case a fix needs to be undone
FAQs
Why does my seamless pattern have white lines after exporting?
A few different things can cause this: a gap or misalignment that already exists between the tile’s opposite edges (which exporting can simply make easier to see), an effect introduced by anti-aliasing or JPEG compression, or a change introduced by a prior resize or transform. We don’t have evidence showing which of these is most common — the export test in Section 3 is the most reliable way to confirm what’s actually happening in your specific file.
Are white lines in an Illustrator pattern swatch just a display bug?
Sometimes, yes — Illustrator’s pattern swatch preview has a well-reported tendency to show thin lines at certain zoom levels that aren’t present in the underlying file or the final export. But this isn’t guaranteed, so don’t assume it without testing: export the file and tile it separately, as described in Section 3, before concluding the line is only cosmetic.
Why does my pattern show gaps when tiled?
This is what Spoonflower’s documentation calls a repeat flaw: a gap along one or more edges of your tile, caused by the artwork not lining up exactly with its continuation on the opposite edge. It’s a real flaw in the file, not a display issue, and needs to be fixed in the original design before exporting or uploading again.
How do I remove white lines from a Procreate seamless pattern?
Start with even-number canvas dimensions, keep Snapping and Magnetics on while positioning repeat elements, and avoid nudging placed selections more than necessary once they’re aligned, since a single tap-to-nudge moves a selection by one pixel. If a line appears after resizing or rotating a layer, check which interpolation method was used for that transform and re-test the edges afterward.
Will a one-pixel gap show when my pattern is printed?
It can. A gap that’s barely visible on a small screen preview can become visible once a pattern is printed larger, because the same pixel-level gap is now physically further apart on the printed surface. Don’t assume a subtle gap is safe to ignore just because it’s hard to see at preview size — test at 100% zoom and, where possible, order a physical sample before committing to a full print run.
Sources
- Spoonflower Help Center — Checking for Repeat Flaws in Designs
- Adobe Help — Best practices for optimal file management in Photoshop and Illustrator
- Adobe Help — Optimizing images for the JPEG format
- Procreate Handbook — Interpolation