You’ve made a seamless pattern, you’re happy with it, and then you upload it somewhere — Spoonflower, Printful, Printify, wherever — and the size is nothing like what you expected. Suddenly your neat little repeat is either the size of a bedsheet or small enough to hide a stamp on it.
This happens to almost every surface pattern designer at some point, and it’s rarely a mistake in the artwork itself. It’s a mismatch between pixels, resolution, and how a particular platform reads that information. Once you understand the relationship between the three, the “why is this so big” moment stops happening.
This guide walks through the pixel math, shows you Spoonflower’s specific system as a real-world example, compares it with how Printful and Printify handle resolution, and gives you a checklist to run through before you order a single sample.
Quick Answers
If you just need the short version before diving into the detail below:
- What size should a seamless pattern be for fabric printing? There’s no single required size — it depends on the platform and the product. What matters is your file’s pixel dimensions and the resolution (PPI/DPI) it will be printed at, since those two numbers together determine the physical size.
- What’s the difference between DPI and PPI? PPI (pixels per inch) describes the pixel density of a digital file. DPI (dots per inch) describes how many dots of ink a printer lays down per inch. They’re often used interchangeably in casual conversation, and most online platforms treat them as the same number when calculating your print size.
- Why does my pattern become larger on Spoonflower? Spoonflower converts every uploaded file to 150 DPI and calculates the printed size using your file’s original pixel dimensions divided by 150. If your file was saved at a higher PPI (like 300), Spoonflower will print it larger than you designed it, because it’s using more of your pixels per inch than your file was set to.
- Is 150 DPI or 300 DPI better for fabric printing? Neither is universally “better” — it depends on the printer. Spoonflower’s own stated minimum and standard is 150 DPI for fabric. Printify recommends 300 DPI generally, and accepts 120–150 DPI for large-format products. Always check the specific platform’s current requirement before assuming a number.
- What’s the difference between tile size and motif scale? Tile size is the physical or pixel dimensions of the repeating file itself — the block that tiles edge to edge. Motif scale is how large the individual design elements look within that tile. Two patterns can share the same tile size and look completely different in scale depending on how big the motifs are drawn inside it.

Pixel Dimensions, PPI, and DPI: What They Actually Mean
Three terms get used almost interchangeably in pattern design, and it helps to pull them apart.
Pixel dimensions
This is the actual grid of pixels that makes up your file — for example, 3600 × 3600 px. Pixel dimensions are fixed once you save the file. They don’t change on their own, and they don’t have a physical size by themselves. A pixel isn’t an inch, a centimeter, or anything physical — it only becomes a physical size once you tell it how many of those pixels should fit into an inch.
PPI vs. DPI
According to Adobe’s own documentation, resolution for digital images is measured in pixels per inch (PPI), while print resolution is measured in dots printed per linear inch (DPI). Technically, PPI describes the pixel density and physical sizing of a raster file, while DPI describes a printer’s output. In practice, many printing and print-on-demand platforms use the term “DPI” in their own documentation and upload screens when what they’re actually communicating is an image-resolution requirement — closer to what PPI describes. That’s why you’ll see Spoonflower, Printful, and Printify all reference “DPI” requirements, without that necessarily meaning every platform handles or calculates that number the same way internally.
For this guide, we’ll use “DPI” the way these platforms do, since that’s the term you’ll actually see in their upload screens and error messages.
The Formula: Physical Size = Pixels ÷ PPI
Here’s the one equation that explains almost every sizing surprise in surface pattern design:
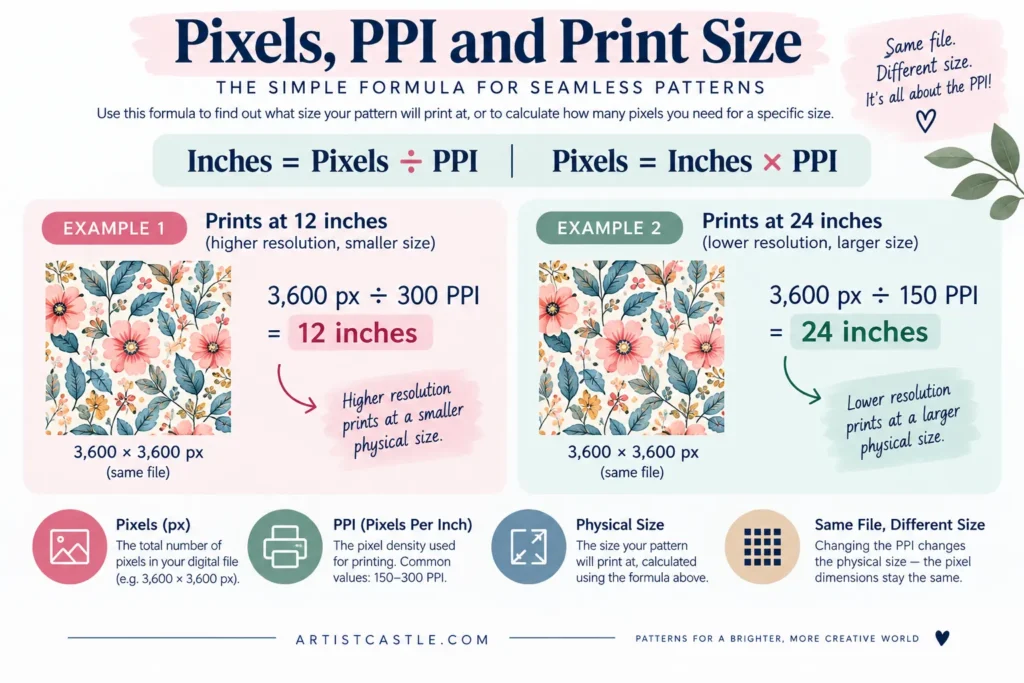
Physical size (inches) = Pixel dimension ÷ Resolution (PPI/DPI)
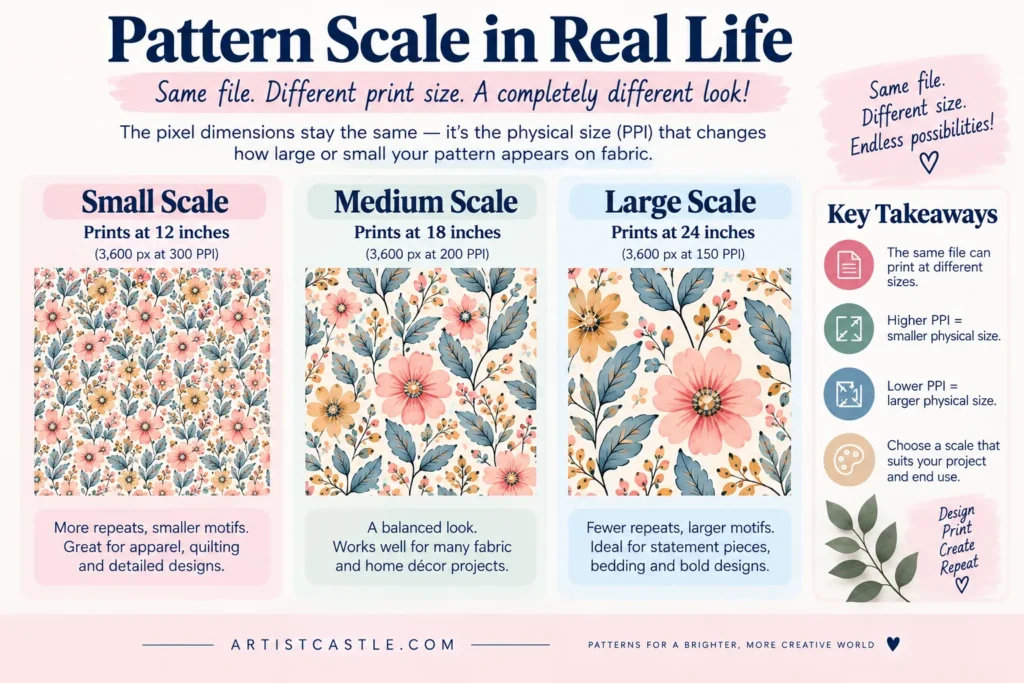
Let’s use the same 3600-pixel file at two different resolutions to see how much that one setting changes the outcome:
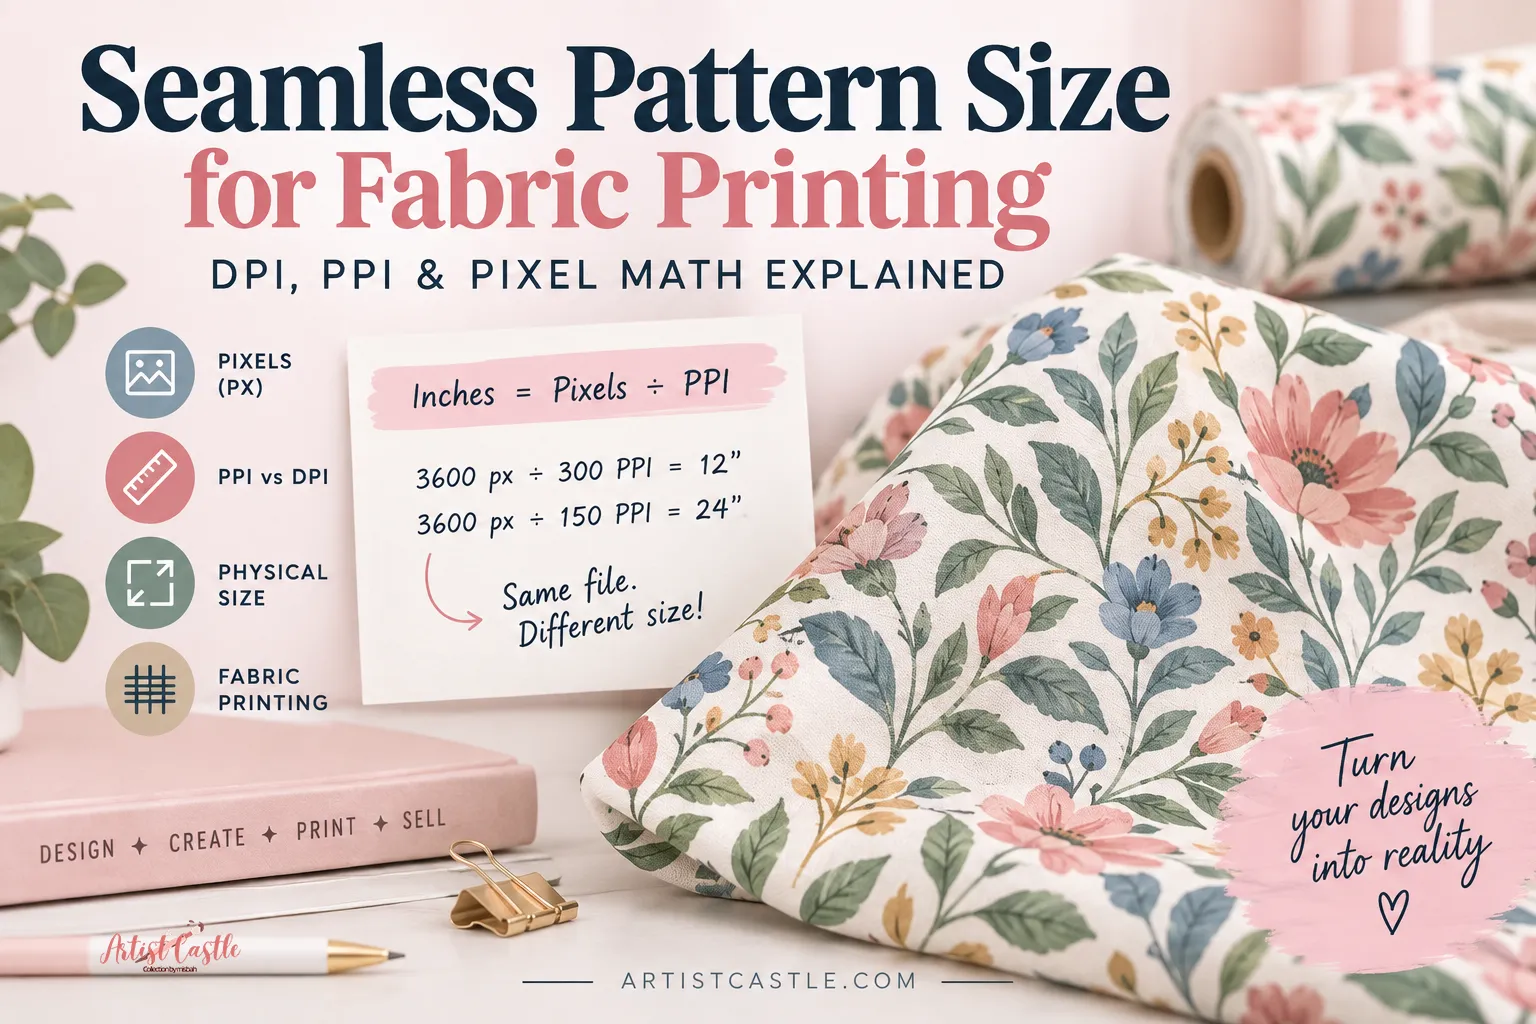
- 3600 px ÷ 300 PPI = 12 inches
- 3600 px ÷ 150 PPI = 24 inches
Same file. Same pixels. Double the physical size, just because the resolution setting is different. This is the exact mechanism behind almost every “why is my design so big” moment — the pixel count never changed, but the platform interpreted those pixels differently.
Want a 12-Inch Repeat? Work Backwards From Your Target Size
You can also flip the formula around. If you already know the physical repeat size you’re aiming for, use this to work out how many pixels your file needs:
Required pixels = Desired physical size (inches) × Resolution (PPI/DPI)
- 12 inches × 150 PPI = 1,800 px
- 12 inches × 300 PPI = 3,600 px
This is handy when you’re starting a new design and already know the repeat size you want — you can set your canvas to the right pixel dimensions from the start, instead of guessing and resizing later.
Quick reference: pixels to inches
| Pixel dimension | At 150 PPI | At 300 PPI |
|---|---|---|
| 1800 px | 12 in | 6 in |
| 2400 px | 16 in | 8 in |
| 3600 px | 24 in | 12 in |
| 4500 px | 30 in | 15 in |
| 7200 px | 48 in | 24 in |
Notice the pattern: at 150 PPI, every result is exactly double what it is at 300 PPI, for the same pixel count. That relationship is worth memorizing, because it’s the fastest way to sanity-check a file before you upload it anywhere.
Why the Same File Can Print at a Different Size on Different Platforms
Here’s the part that catches even experienced designers off guard: the “300 DPI” written in your file’s metadata is a label, not a rule the platform is obligated to follow.
Some platforms read that metadata and calculate size directly from it. Others — like Spoonflower — ignore your saved resolution entirely and convert every file to their own fixed value before calculating size. That single difference explains why the exact same file can come out at completely different physical dimensions depending on where you upload it.
In other words, your file doesn’t have one fixed “true” size. A raster file can contain resolution or physical-dimension metadata, but a printing platform may interpret, override, or ignore that information according to its own workflow. So it’s really your pixel dimensions plus the platform’s own output and processing rules, together, that determine the resulting physical size — and that’s worth checking for every platform individually, rather than assuming they all behave the same way.

Spoonflower’s 150-DPI System (A Real-World Example)
Spoonflower is a useful case study because its system is well documented and because so many designers run into this exact confusion there. To be clear, this section describes Spoonflower’s specific, official workflow — not a universal standard every platform follows.
According to Spoonflower’s own Help Center, the platform converts every uploaded JPG or PNG file to 150 DPI, regardless of the resolution it was originally saved at, and calculates the printed size using the file’s pixel dimensions divided by 150. Spoonflower states this is because 150 DPI is their sweet spot for fabric printing — they’ve found it produces a clean, detailed result on the substrates they print on, and it’s also the lowest resolution the platform will accept.
Here’s the exact example Spoonflower gives in their own documentation: a designer creates a file measuring 8″ × 10″ saved at 300 DPI. Multiplying those figures out, that file is 2400 × 3000 pixels (8 × 300, and 10 × 300). Once it’s uploaded, Spoonflower converts it to 150 DPI and recalculates size from the pixel dimensions: 2400 ÷ 150 = 16″, and 3000 ÷ 150 = 20″. So a file the designer intended to print at 8″ × 10″ comes out at 16″ × 20″ — exactly double, in both directions, because 300 DPI is exactly double 150 DPI.
This is the single most common reason for the “why is my Spoonflower design so big” experience. It isn’t a bug and it isn’t random — it’s a predictable result of the platform’s fixed 150 DPI conversion meeting a file saved at a different resolution.
The fix, per Spoonflower’s own guidance, is straightforward: either save your working file at 150 DPI before uploading, so the pixel dimensions already match your intended print size, or use Spoonflower’s own scale/DPI adjustment tools on the design layout page after uploading to resize it down to what you want. You can always make an uploaded design smaller on Spoonflower; you can’t make it larger than the pixel dimensions you originally uploaded allow.
Seeing thin gaps or lines between your repeated tiles? Our guide to fixing white lines in seamless patterns explains how to tell a real repeat flaw from a possible display artifact and how to troubleshoot it.
How Printful, Printify, and Other Print-on-Demand Platforms Differ
If you sell patterns on general print-on-demand goods rather than fabric by the yard, it’s worth knowing that Printful and Printify don’t handle resolution the same way Spoonflower does — and don’t necessarily match each other either.
Printful’s own guidance states that 150 DPI is their general sweet spot for print quality, and their published file checklist lists 150–300 DPI as an acceptable range, recommending 300 DPI specifically for smaller, detail-heavy products such as mugs or phone cases. Printful’s Design Maker also validates resolution automatically at upload and will flag a file that falls below its minimum for the chosen product.
Printify’s official Help Center states a general recommendation of 300 DPI for JPEG and PNG files, but notes that a lower resolution can be acceptable depending on the product — and specifically calls out that large-format items like leggings, blankets, and tapestries only require 120–150 DPI. Printify also states that it will automatically attempt to enhance a low-resolution file before sending an order to production, though this has limits and isn’t a substitute for starting with a good file.
The practical takeaway: don’t assume a resolution setting that works on one platform will behave identically on another. Spoonflower converts every file to a fixed 150 DPI. Printful and Printify both work within a range that depends on the specific product. Always check the current file requirements for the specific platform and product you’re using before you finalize your pattern file — these numbers do get updated by the platforms from time to time.
Pattern Tile Size vs. Motif Scale
These two terms get mixed up constantly, and they’re not the same thing.
- Tile size is the dimensions of the repeating unit itself — the block of pixels that gets duplicated edge-to-edge to create the continuous pattern. This is what your pixel-dimensions-and-PPI math above actually describes.
- Motif scale is how large the individual design elements look within that tile — a single floral sprig, a polka dot, a geometric shape. You can have a small tile with a large motif that gets cropped at the edges, or a large tile with several small motifs scattered across it.
This distinction matters because changing your tile’s pixel dimensions or DPI doesn’t just resize the tile — it also rescales every motif inside it, proportionally. If you halve your resolution and your tile prints twice as large, your motifs are now twice as large too, which can push a delicate, fine-detail pattern into looking chunky and oversized on the finished product.
There’s no single “correct” tile size or motif scale for every product — it depends entirely on what you’re printing and how it will be viewed. A pattern meant to be seen up close (like a baby item or stationery) generally reads very differently at scale than one meant to be viewed from across a room.
How to Test Your Pattern’s Scale Before You Order
A few habits will save you from ordering a sample you already know is wrong:
- Check your file’s pixel dimensions directly, not just the “size” your design software shows you. In Photoshop, Image > Image Size shows both. On a Mac or PC, right-click the file and check its properties/details.
- Divide those pixel dimensions by the platform’s stated resolution to work out what physical size you’ll actually get, using the formula above — don’t rely on what your design software’s canvas size says, since that’s based on whatever resolution you set locally, which may not match how the destination platform interprets the file.
- Use the platform’s own preview window once you’ve uploaded. Spoonflower, Printful, and Printify all show a scaled preview with ruler markings or a size readout — this is the number to trust, not your file’s original label.
- Order one physical sample before committing to a full product line. A screen preview can’t fully show you how a repeat looks at true scale in your hand.
- Zoom in on your seams before uploading. A pattern that repeats “seamlessly” on your screen at a small preview size can reveal thin lines or slight misalignment once printed larger — issues that are much easier to spot and fix at the file stage.
Troubleshooting: Common Pattern-Sizing Mistakes
- “I saved at 150 DPI in my software, but the size still changed.” Some design programs only update the DPI label without resampling the actual pixels, which leaves your pixel dimensions unchanged even though the displayed number is different. Check the pixel dimensions directly (not just the DPI field) to confirm they match what you intended.
- “My pattern is a completely different size than the same file was last time.” If you re-exported or re-saved the file at any point, even a small change in export settings can alter the resolution value that gets embedded, even when the pixel dimensions look the same. Re-check both numbers after every export.
- “The preview looks right, but the physical sample was huge.” On-screen previews are sometimes displayed at a fixed viewing size regardless of actual print dimensions. Trust the platform’s stated inches/cm readout over how large or small it looks in the preview window.
- “My repeat shows a visible seam once it’s printed larger.” Repeat flaws that are invisible at a small screen size often become visible once a pattern is enlarged, because the misaligned pixels are now physically further apart. Check your tile’s edges at 100% zoom, not a shrunk-down thumbnail.
Pre-Upload Checklist
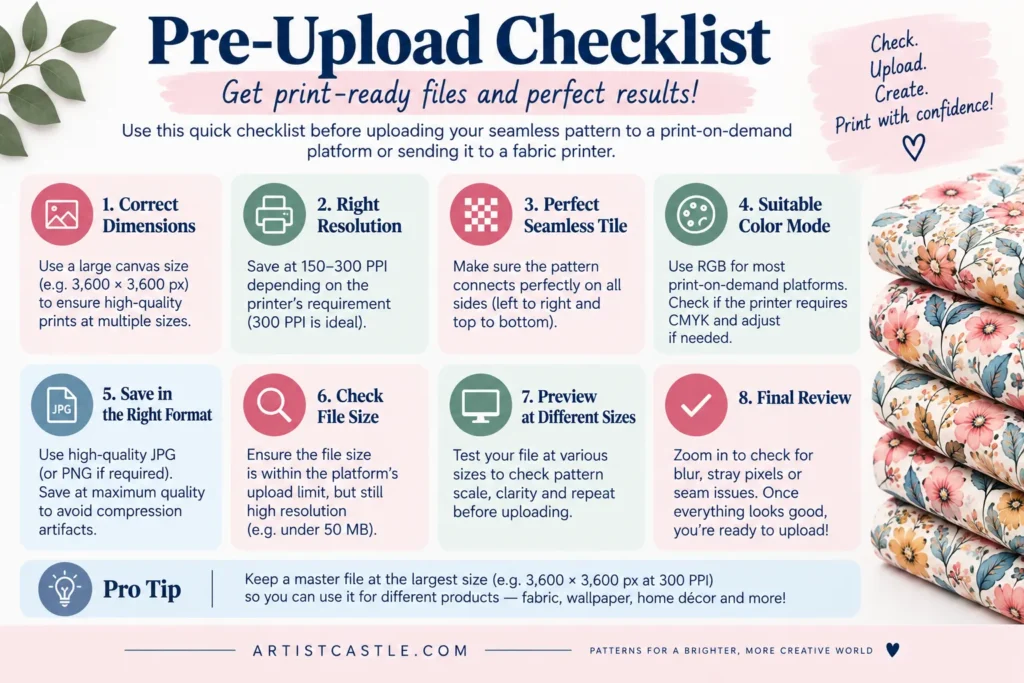
- Confirmed the exact pixel dimensions of your file (not just the DPI label)
- Checked the current file/resolution requirements for the specific platform and product you’re uploading to
- Calculated the expected physical size using pixels ÷ platform resolution
- Zoomed in on all four tile edges to check the repeat lines up cleanly
- Saved a backup of the original, un-resized file in case you need to re-export at a different resolution later
- Reviewed the platform’s own preview/measurement tool after uploading, rather than trusting your file’s label alone
- Planned to order one physical sample before listing a product for sale
FAQs
Why does my pattern print at a different size than I designed it at?
Because physical print size isn’t stored in your file the way you might expect — it’s calculated from your pixel dimensions divided by whatever resolution the platform ends up using, which may not match the DPI value saved in your file. Different platforms handle that calculation differently, which is why the same file can come out at a different size in different places.
Does a higher DPI always mean better quality?
Not necessarily, and it depends which kind of change you’re making. Simply typing a new DPI/PPI number into a file without resampling doesn’t add any pixels — it only changes how a platform interprets the physical size of the pixels you already have. Resampling or upscaling a file to increase its actual pixel dimensions is a different operation, and it doesn’t automatically create genuine image detail that wasn’t there before; it just generates more pixels based on what’s already in the file. Each platform has its own recommended and minimum resolution, and starting with a genuinely high-resolution file matters more than chasing the highest DPI number possible.
Can I make an uploaded pattern larger after uploading it?
Generally, no — not without quality loss. Most platforms, including Spoonflower, let you scale a design smaller after upload, but they can’t add pixel information that isn’t already in the file, so you typically can’t enlarge it past the size your original pixel dimensions allow.
Is there one “correct” tile size for a seamless pattern?
No — there’s no single universal tile size that works for every product or every printer. The right tile size depends on the product you’re printing on, the platform’s requirements, and how large or small you want the repeating motifs to appear.
If you’re new to print-on-demand more broadly, our beginner’s guide to starting a print-on-demand business covers the wider process, from choosing a supplier to pricing your products. And if you’re preparing files for home printing rather than fabric or POD platforms, our guide to digital paper sizing and resolution covers the same pixel-and-DPI math for that context. Once your patterns are ready to sell, ArtistCastle’s free Surface Pattern Profit Calculator can help you work out what to charge once your product costs are set.